
So what is MinIO, well I take straight from their overview page:
MinIO is a high performance, distributed object storage system. It is software-defined, runs on industry standard hardware and is 100% open source with the dominant license being GNU AGPL v3.
MinIO is different in that it was designed from its inception to be the standard in private/hybrid cloud object storage. Because MinIO is purpose-built to serve only objects, a single-layer architecture achieves all of the necessary functionality without compromise. The result is a cloud-native object server that is simultaneously performant, scalable and lightweight.
While MinIO excels at traditional object storage use cases like secondary storage, disaster recovery and archiving, it is unique at overcoming the challenges associated with machine learning, analytics and cloud-native application workloads.
So the long and the short of it is Amazon S3 storage for Bare Metal. It comes in a few different flavors i.e. Docker, Kubernetes, Vmware, Azure Kubernetes, Google Kubernetes.
Is this blog post I wanted to show just how easy it is to setup for dev environment or something that doesnt need full production setup. I will be doing another post showing how I do full setup in Bare Metal Kubernetes and how hard it can be so stay turn for that one.
In this example, I am going to run a simple docker container on my Synology DiskStation Nas at home, I wanted to use it for a few things, but I also wanted to allow my wife who is a snr software engineer to dev against it and see if its any use for the work she doing in her start-up.
Prerequisites
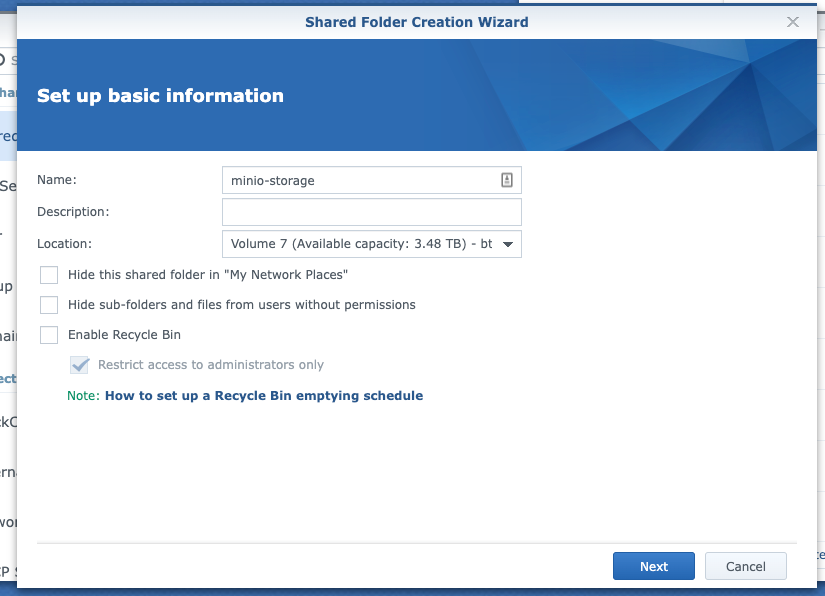
First thing first, let's get the NAS setup and ready for use. I am running Synology DS1815+ with DSM 6.2.2. First we need to make sure we have shared folder that we can store data on.
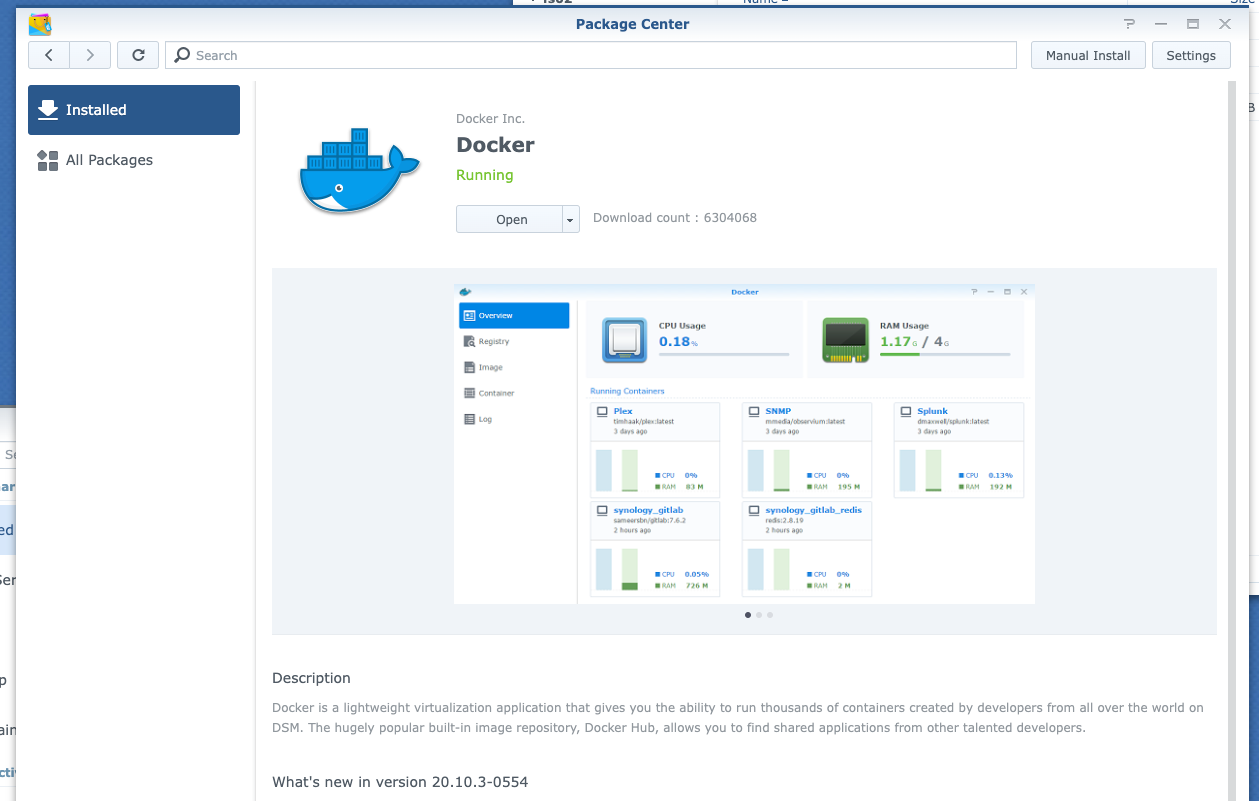
Then we want to install Docker from the package center if not already running:
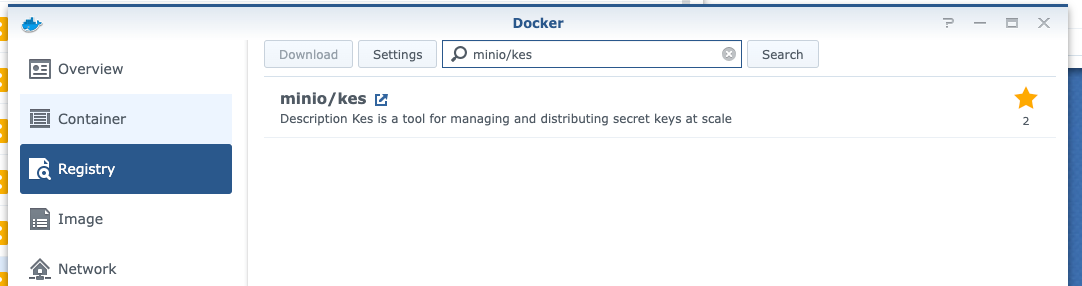
Once we have docker open we need to pull a couple of images, first one is minio/minio:latest and the second one is minio/kes:latest (Key Management Server and we'll get into that later). So to pull the images search for them in the Registry tab:

Once downloaded you will find them in the Image tab
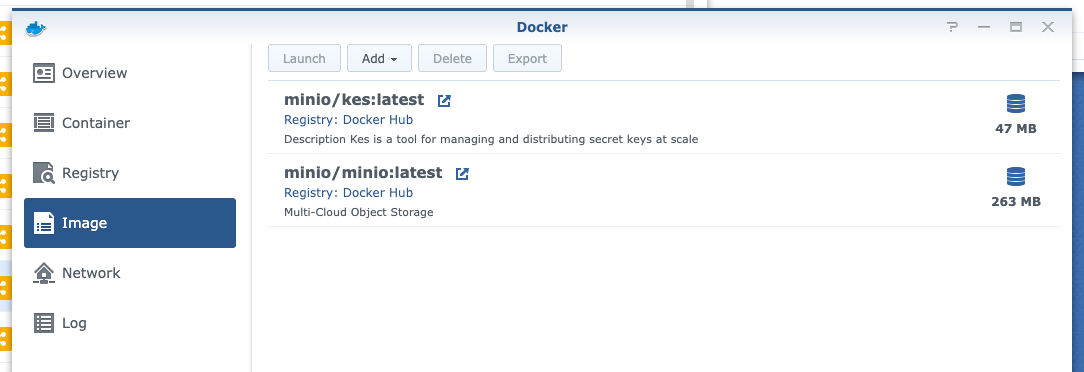
Minio kes
I mention before minio/kes, now this is a Key Management Service/Server and I want to use this to enable Encryption-at-rest again this is going to be a really basic setup not meant for production, not to say you can't use this server in production, which you could just not in the following setup.
For minio/kes we need a config file and some certificates, their docker hub page shows how to configure certificates, but for some reason, I could not get this to work and would get "SSL version incorrect errors" so I used a cheap SSL certificate I had for my NAS instead.
You need the certificate key, CA certificate, and your public certificate. Another little buggy thing I found and I think it's because of the cert I used, that I had to have my public certificate include the full CA bundle as well as having the CA as a separate certificate. So I put them in a certs folder in the shared folder I created before:
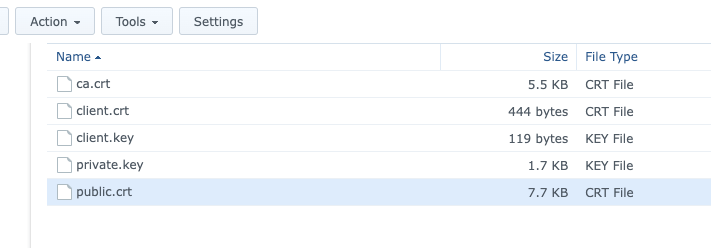
You also see that there is a client key and certificate. These are required for MinIO to talk to KES and to get these you need to run the following:
$ kes identity new --key=client.key --cert=client.crt MinIO

Private key:  client.key
Certificate:  client.crt
Identity: 02ef5321ca409dbc7b10e7e8ee44d1c3b91e4bf6e2198befdebee6312745267b
Two things here, I plan on running this all in docker, so how do I run this before I have docker, well I just installed the CLI tool on my mac with
brew install minio/stable/kesThe second thing is the Identity: 02ef5321ca40.... keep note of this as you need it in the config file, now if you need it can be pulled from the cert using the following command:
$ kes identity of client.crt

Identity:  02ef5321ca409dbc7b10e7e8ee44d1c3b91e4bf6e2198befdebee6312745267b
Now you have this you can create the kes config file, its really basic and I used the following:
address: 0.0.0.0:7373 # Listen on all network interfaces on port 7373

admin:
  identity: disabled # We disable the admin identity since we don't need it in this guide

tls:
  key: /certs/private.key # The KES server TLS private key
  cert: /certs/public.crt # The KES server TLS certificate

policy:
  my-app:
    allow:
      - /v1/key/create/minio-*
      - /v1/key/generate/minio-*
      - /v1/key/decrypt/minio-*
      - /v1/key/list/*
    identities:
      - xxxxxxxxxxxxxxxxxx #insert the Identity from the client cert generated before

keystore:
  fs:
    path: ./keys

log:  # Not needed but good to have when first configuring
  error: on
  audit: on
For ease of it, below is the JSON file for the docker settings for DSM, its DSM version of a docker-compose. This way I don't need to add loads of screenshots and you can copy and paste.
{
  "cap_add": null,
  "cap_drop": null,
  "cmd": "server --config /config.yml --auth off",
  "cpu_priority": 50,
  "devices": null,
  "enable_publish_all_ports": false,
  "enable_restart_policy": true,
  "enabled": false,
  "entrypoint_default": "/kes",
  "env_variables": [
    {
      "key": "PATH",
      "value": "/usr/local/sbin:/usr/local/bin:/usr/sbin:/usr/bin:/sbin:/bin"
    },
    {
      "key": "KES_CLIENT_CERT",
      "value": "/certs/client.cert"
    },
    {
      "key": "KES_CLIENT_KEY",
      "value": "/certs/client.key"
    },
    {
      "key": "KES_SERVER",
      "value": "https://nas.somedomain.io:7373"
    }
  ],
  "exporting": false,
  "id": "d8eb1018d63c2556cd28460132279c322ae94da162616fd8a439cba6ea7a19f4",
  "image": "minio/kes:latest",
  "is_ddsm": false,
  "is_package": false,
  "links": [],
  "memory_limit": 0,
  "name": "minio-kes1",
  "network" : [
      {
         "driver" : "host",
         "name" : "host"
      }
   ],
   "network_mode" : "host",
   "port_bindings" : [],
  "privileged": false,
  "shortcut": {
    "enable_shortcut": false
  },
  "use_host_network": false,
  "volume_bindings": [
    {
      "host_volume_file": "/minio-storage/minio-kes/certs",
      "mount_point": "/certs",
      "type": "ro"
    },
    {
      "host_volume_file": "/minio-storage/minio-kes/config.yml",
      "mount_point": "/config.yml",
      "type": "ro"
    },
    {
      "host_volume_file": "/minio-storage/minio-kes/keys",
      "mount_point": "/keys",
      "type": "rw"
    }
  ]
}
Things to note here, first the environment vars include:
KES_CLIENT_CERT - this is the client cert you generated beforeKES_CLIENT_KEY - this is the client key you generated beforeKES_SERVER - where you want this server to be accessed from
Next is the cmd, which is the same as command: in docker-compose"cmd": "server --config /config.yml --auth off" this just points to the config file that you created and will mount to the docker container.
Next are the volumes to mount. There are three volumes, first is the certs which can be read only and is just a folder-to-folder mount, then there is the config that we mount directly and again can be read-only. The last one and probably the most important one of all is the volume of the keys, I didn't see anywhere about this but you want to have this mounted somewhere or when your container restarts you will lose your keys, and not be able to decrypt any data!
Ok once that config has been imported you can start the container and check the logs and see something like this:
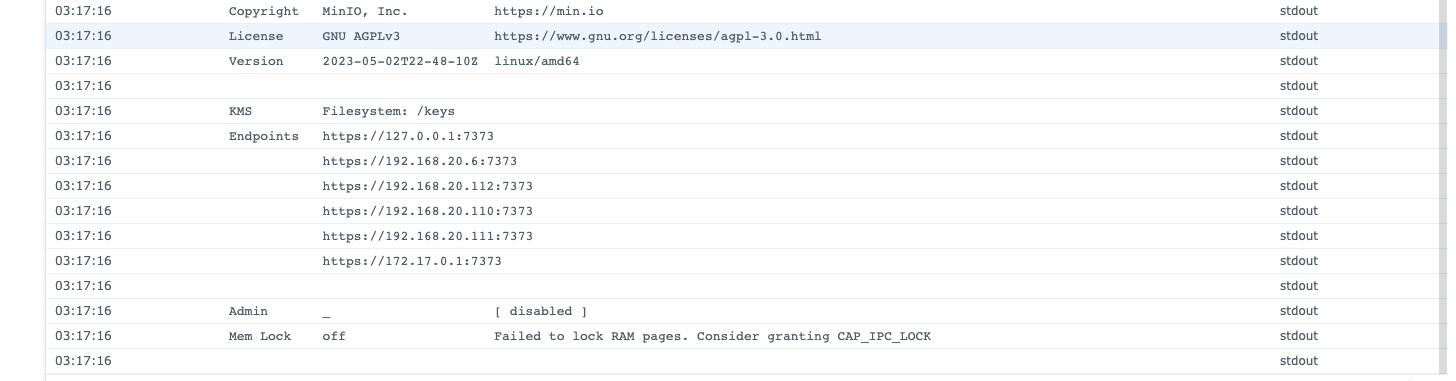
You will see a warning about Failed to lock RAM pages. Consider granting CAP_IPC_LOCK for dev this is fine, what it is complaining about is the fact the KMS service is using memory that can/could be accessed which means encryption data or keys could be leaked.
In production, you would want to run the following commands on the host to stop this:
$ sudo setcap cap_ipc_lock=+ep $(readlink -f $(which kes))

$ # Then run the server with the --mlock switch

$ kes server --config config.yml --auth off --mlock
Minio
Now we have kes service up and running we can move on to Mino itself, it's pretty simple, we start with creating a folder location for where data can be stored. I just created a folder called mini/data. Next is the configuration file for docker, I used the following:
{
   "cap_add" : [],
   "cap_drop" : [],
   "cmd" : "minio server /data --certs-dir /certs --console-address :9090",
   "cpu_priority" : 50,
   "devices" : null,
   "enable_publish_all_ports" : false,
   "enable_restart_policy" : true,
   "enabled" : true,
   "entrypoint_default" : "/usr/bin/docker-entrypoint.sh",
   "env_variables" : [
      {
         "key" : "MINIO_KMS_KES_CA_PATH",
         "value" : "/certs/ca.crt"
      },
      {
         "key" : "MINIO_KMS_KES_KEY_NAME",
         "value" : "minio-default-key"
      },
      {
         "key" : "MINIO_KMS_KES_KEY_FILE",
         "value" : "/certs/client.key"
      },
      {
         "key" : "MINIO_KMS_KES_CERT_FILE",
         "value" : "/certs/client.crt"
      },
      {
         "key" : "MINIO_KMS_KES_ENDPOINT",
         "value" : "https://nas.somedomain.io:7373"
      },
      {
         "key" : "MINIO_ROOT_PASSWORD",
         "value" : "some password"
      },
      {
         "key" : "MINIO_ROOT_USER",
         "value" : "some user"
      }
   ],
   "exporting" : false,
   "id" : "2f942cce6331201dad08863f6e3758e706c187dc611e3099a13544558bf53bb1",
   "image" : "minio/minio:latest",
   "is_ddsm" : false,
   "is_package" : false,
   "links" : [],
   "memory_limit" : 0,
   "name" : "minio-minio1",
   "network" : [
      {
         "driver" : "host",
         "name" : "host"
      }
   ],
   "network_mode" : "host",
   "port_bindings" : [],
   "privileged" : false,
   "shortcut" : {
      "enable_shortcut" : false
   },
   "use_host_network" : true,
   "volume_bindings" : [
      {
         "host_volume_file" : "/minio-storage/minio-kes/certs",
         "mount_point" : "/certs",
         "type" : "ro"
      },
      {
         "host_volume_file" : "/minio/data",
         "mount_point" : "/data",
         "type" : "rw"
      }
   ]
}
Environment Variables, firstly Docker will create a tone of default variables but in this dev instance all we need is:
MINIO_KMS_KES_CA_PATH - I needed this because for some reason nothing trusted the Cert that I had brought from ssls.com but what do you expect for $1 a year cert!MINIO_KMS_KES_KEY_NAME - this is the default KMS key that will be available in Minio and don't worry Minio will create it for you.MINIO_KMS_KES_KEY_FILE - The file location to the KES server public CertificateMINIO_KMS_KES_CERT_FILE - The file location to the client Certificate we created beforeMINIO_KMS_KES_ENDPOINT - The endpoint to KES serverMINIO_ROOT_PASSWORD - a password to access the consoleMINIO_ROOT_USER - and admin user name to access the console
Next, we look at the volumes to mount. We want Minio to have access to the certs we created for KES so we add that volume as Read-Only. Then we need somewhere to store the data, so we mount a volume for the data store.
Last but not least is the command:
"cmd" : "minio server /data --certs-dir /certs --console-address :9090"so we want to start the server and point it at the /data folder, we tell the server to open the console on port 9090 and that it's open on any IP. Lastly and you don't need this but helps later when you use the AWS CLI, I add the --certs-dir switch and a location to some certs. Now Minio is good enough if it finds certs in that folder then it will switch from being HTTP to HTTPS! This is good because then you don't have to worry about telling AWS CLI to ignore SSL issues.
Now we can start the Minio container, it takes a min or so but if you check the logs, you should see something like this:
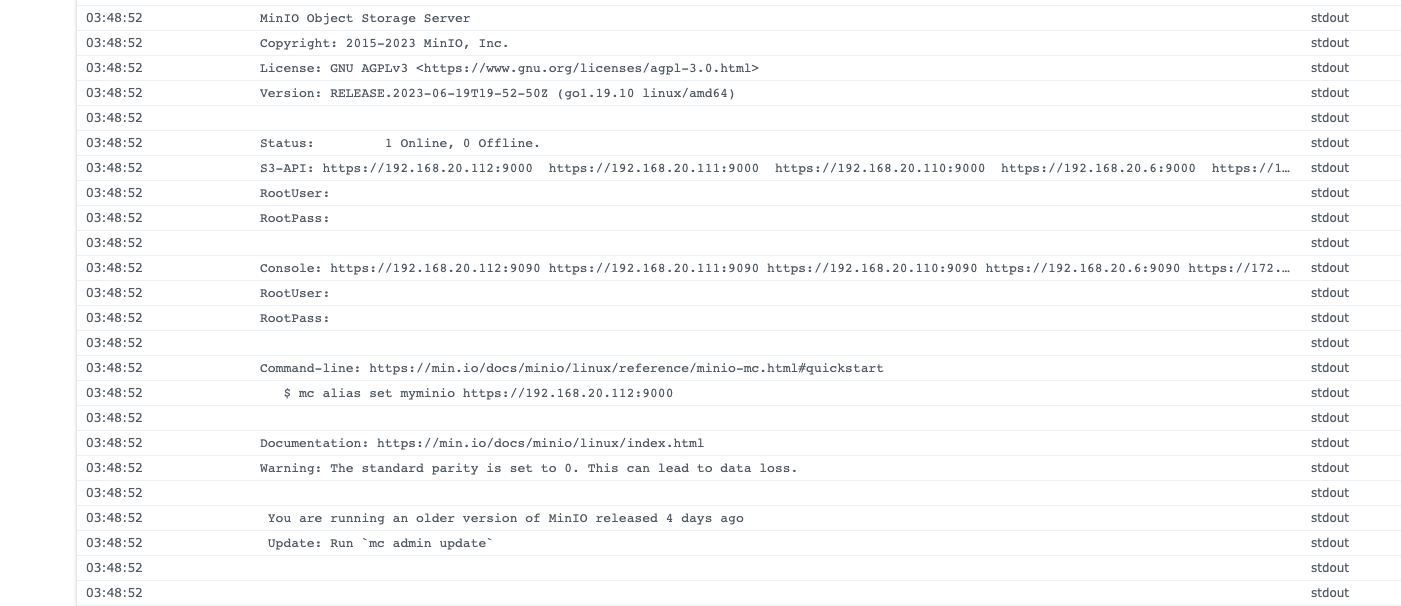
Configure Bucket
Log into the console using the address you have for the container, because I am using host network its the same IP as my Nas just on port 9000.
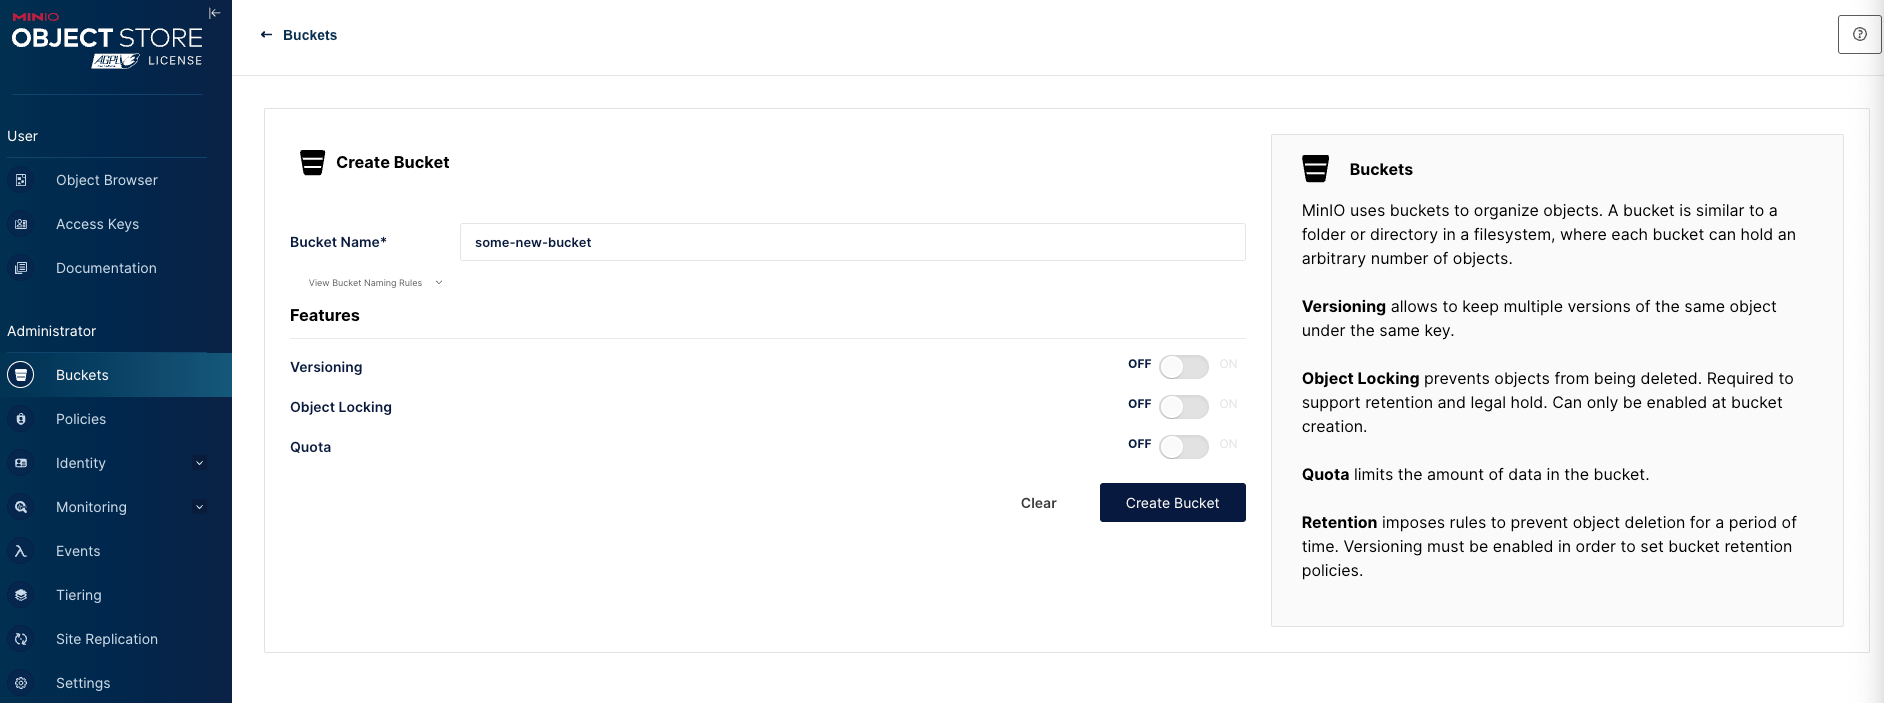
Once signed in you can create a new bucket and configure as needed:

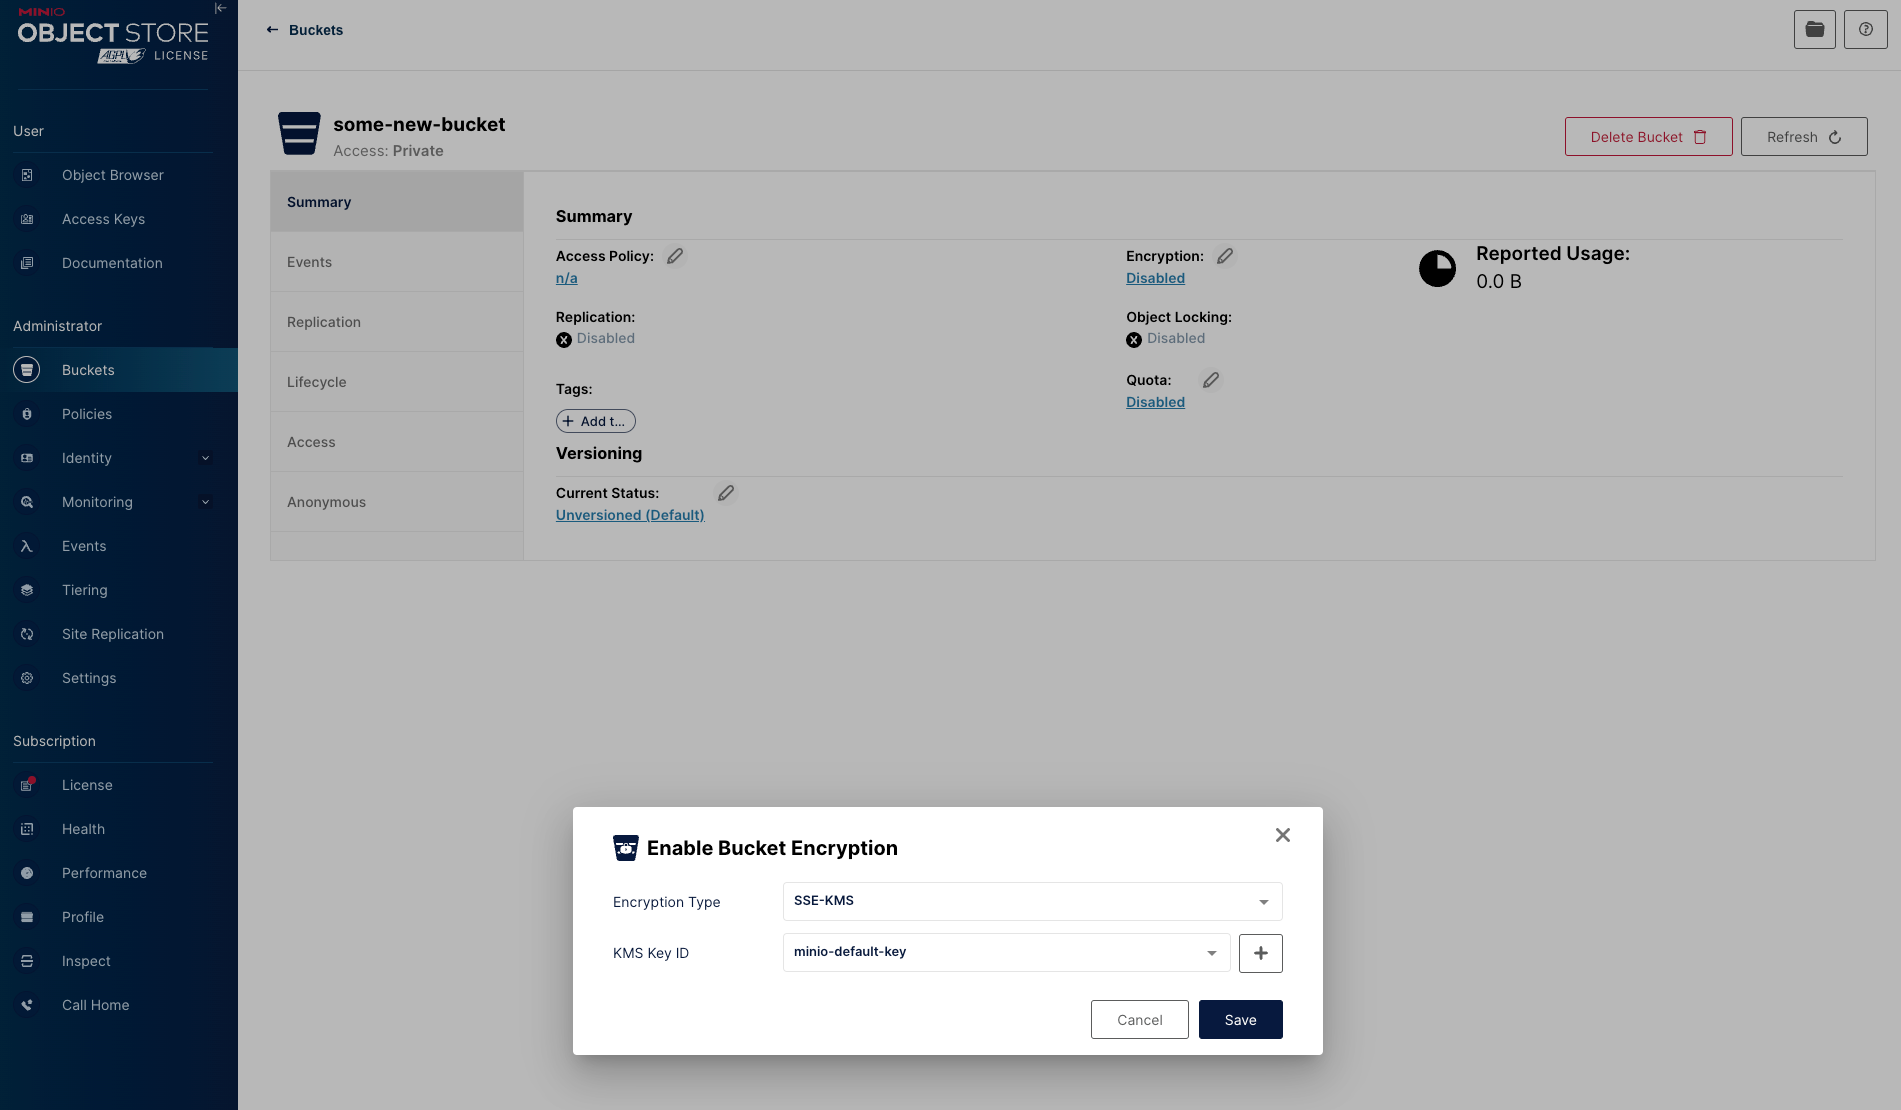
So the first thing I do once the bucket is created is set the encryption key, went to all that effect to configure might as well use it from the start.
From this point it really is just like S3, you can configure policies, life cycles, access keys, etc. I won't go into that.
Using AWS CLI with Minio
Assuming you have AWS CLI installed if you don't google how, its simple, for Mac users you can just use Homebrew.
First you want to configure your access keys, this is simple just edit the ~/.aws/credentials file to look like this:
[default]
aws_access_key_id = some_key
aws_secret_access_key = some_long_secret
Of course that's really simple, you may have more than the default profile, but if you do I am guessing you know what you are doing from here.
now its as simple as running a command but just changing the endpoint to point at your minio instance:
aws --endpoint-url https://nas.somedomain.io:9000 s3 ls